Showing posts with label Organic. Show all posts

Sunday, September 8, 2013

Epsom Salts, "In The Garden?"

   Using Epsom salt in gardening is not a new concept, its something I would see my Grammy and Aunt Annice use often in there vegetable garden and flower garden and then soak their tired feet in a hot tube of water with it after a long day in the garden! Using Epsom Salts in the garden has been around for many generations. But does it really work? I know I personally have seen differences since recalling this trick they used, so lets look at why I may have seen a difference.
  Why put Epsom salts on plants? Is Epsom Salt Good for Plants? Yes, Epsom salt helps improve flower blooming and enhances a plant’s green color. It can even help plants grow bushier. Epsom salt is made up of "hydrated magnesium sulfate" (magnesium and sulfur), which is important to healthy plant growth.  Even if you don’t believe in its effectiveness, it never hurts to try it. Magnesium allows plants to better take in valuable nutrients, like nitrogen and phosphorus. It also helps in the creation of chlorophyll, which is vital for photosynthesis. In addition, magnesium greatly improves a plant’s ability to produce flowers and fruit. If the soil becomes depleted of magnesium, adding Epsom salt will help; and since it poses little danger of overuse like most commercial fertilizers, you can use it safely on nearly all your garden plants.
  How to Water Plants with Epsom Salts? It’s easy. Simply substitute it for regular watering either once or twice a month. Before applying Epsom salt, however, it’s a good idea to have your soil tested to determine whether it’s deficient of magnesium. You should also be aware that many plants, like beans and leafy vegetables, will happily grow and produce in soils with low levels of magnesium. Plants like rose, tomatoes and peppers, on the other hand, require lots of magnesium; and therefore, are more commonly watered with Epsom salt.
  When diluted with water, Epsom salt is easily taken up by plants, especially when applied as a foliage spray. Most plants can be misted with a solution of 2 tablespoons of Epsom salt per gallon of water once a month. For more frequent watering, every other week, cut this back to one tablespoon.
With roses, you can apply a foliage spray of 1 tablespoon per gallon of water for each foot of the shrub’s height. Apply in spring as leaves appear and then again after flowering.
  For tomatoes and peppers, apply 1 tablespoon of Epsom salt granules around each transplant or spray (1 tbsp. per gallon) during transplanting and again following the first bloom and fruit set. One great article I found was"Fertilize with Epsom Salts" By: Charlie Nardozzi, it's a very good introductory into this subject!
 Another benefit that I have found personally with using Epsom salt in the garden is as a "natural pesticide" for snails and slugs around my hosta's and other shade loves. I mean think about it, if you sprinkle salt on a slug what happens but if you just sprinkle Epsom salts around the base of the plants, it deters the slimy buggers!
  It has many other benefits but we are just sticking with the garden aspect of it, here is a quick video to help get all of this stuck in your mind! "Epsom Salts" with Dr. Bruce.
  I hope you have a successful go with Epsom Salts and hopefully I can remember some more of these old tricks that I saw used growing up!

Proverbs 22:6 "Train up a child in the way he should go;even when he is old he will not depart from it."

Thursday, March 7, 2013

The Jell-O "Planting Tip"

NO! We aren't gonna talk about Jell-O wrestling, lol! Just a tip for staring seeds that Grammy told me about the other day on the phone. She said was when starting seeds, you can sprinkle Jell-O in before you plant the seeds! She said it does 2 things: The first thing it does is the gelatin in the Jell-O helps keep moister in the starting mix. The second thing it does is the sugar feeds the plant as it grows. So just a little quick tip for your garden! 

Saturday, February 2, 2013

Worm Tubes, "A Worms Buffet"

   While doing the 3 part soil series, I was asked many times more about the "Worm Tubes". So I thought maybe I should do a quick post to help explain a little more. They are really easy to make and install any they help attract your "Garden Champions". It's like making a "Buffet" in your garden for them, its up to you if you charge them or not, lol!
    First you will want to make a trip to the plumbing dept. of your favorite hardware store or if you have a "Habitat for Humanity Restore" in your area you can go there as well and probably get your supplies you need! (it doesn't have to be new)
    Here is this list you will need: 1) A piece of 3" or larger PVC Drain pipe. You can get the french drain pipe with the holes already in it or you can drill the holes yourself, (Holes need to be large enough for your worm customers to enter, lol). 2) You will need 1 cap to fit each worm tube that you are making. 3) If you don't have a saw to cut your pipe, you better swing by the tool dept. as well!
Pipe you need
Cap you need


   So you have your supplies, know for the fun part, unless you are like me and love to go to the hardware store! 
  1. Cut your pipe into 3' sections or longer depending how much you want above ground.
  2. At this point if your pipe doesn't have holes you will need to drill holes in it 3/4" or larger, (I feel larger if you can). Leave the end of the pipe that is barred cap free!
  3. Dig down, in your garden area, 2' to 2 1/2' (use a post hole digger for a nice round hole) you can go deeper if you would like as well.
  4. Place pipe in hole vertically into ground 2' to 2 1/2' into ground and back fill dirt.
  5. Start dropping your kitchen scraps into the tube and put the cap on, so you can easily remove it!   Note: Follow the same guidelines for this that you would your compost bin. Don't put greasy foods, meats, ect. into the tubes!
  You can do this in a conventional garden or raised beds if you would like. A hint for conventional gardens: you could use a large trash can! Just cut the bottom out of it, drill holes in the sides and put it halfway or deeper in the ground. Use it the same way but with this one you could drop small amounts of leaves or grass clippings in as well!

  I hope you have fun with this and I am sure some of you will even come up with cleaver, artistic ways to  disguise them in your garden. When you do, please stop back by and drop us a link so that we can come see! Here is the finished product for you as well.
See them in the Corners?

More on soil:
"Black Gold and Other Soil Amendments"
"Garden Soil Part 1"
"Garden Soil Part 2" 
"Garden Soil Part 3"
"My Neighbors Raised beds"

Matthew 25:37 “Then the righteous will answer Him, saying, ‘Lord, when did we see You hungry and feed You, or thirsty and give You drink?
Linked With:
Lets Get Social Sunday,  Simple Sunday, The Creative HomeAcre,Clever Chicks Hop, Harvest Monday, Teach Me Tuesday, Frugal Tuesday,The Backyard Farming Connection, Frugal Days Sustainable Way, Down Home Blog Hop, Wicked Awesome Wednesday, Country Homemaker Hop, Simple Living Wednesday, Home and Garden Thursday, Simple Lives Thursday, The Country Garden Showcase, Freedom Fridays, Thursdays Favorite Things, Fridays Fertilizer Flaunts, Natural Life Link Up, Weekend Whatever, Farm Girl Friday, Farm Girl Blog Fest, Clever Chicks Blog Hop, On it, In it and Around it, A Pinteresting Party, Sweet Saturday 

Saturday, January 19, 2013

"Great Soil is a Gardens Foundation", Part 2

   Okay, so now I am sure you have figured out what your soil pH is, what type of soil you have, if it has the right drainage and how your microorganisms are in your soil! Right? That is if you read part 1 last week?? So here are some tips and secrets to help your soil.

#1 If your soil isn't draining correctly, its probably because it's clay soil! So what can you do? Feed it lots of Organic Matter! Dig in lots of chunky like straw, pine needles, wood chips. You can also work in leaves, grass clippings, animal manure (not dog or cat), or my favorite thing, Compost. These will open up the soil so that nutrient and worms call move through the soil better.  
        Tip: Fresh organic matter uses lots of nitrogen during the break down process. But you can correct this if you will add one of these three things to each bushel of organic material you add to the soil.
         1 pound of nitrate of soda or (Ammonium sulfate, ammo-phos, cottonseed, soybean meal, or tankage)
      1/2 pound of ammonium nitrate
      1/2 pound of ammonium sulfate

#2 Dig in your Organic material in the fall,  the best way to do this is by Double Digging. 
         What is double-digging? Nothing more than loosening the soil more than 12 inches down to create conditions that your plants' roots can stretch their legs out in and soak up more nutrients and water!
         How do you double dig?  Begin at one end of the bed and dig a 1-foot-wide by 1-foot-deep trench across the bed's width, placing the excavated dirt in a wheelbarrow or tarp. Next, work a garden fork into the floor of the trench and slowly rock it back and forth to loosen the soil. Continue until the soil in the excavated area is loosened. Dig a second, similar-size trench next to the first, this time placing the excavated soil in the first trench. Loosen the soil at the bottom of the second trench with the garden fork. Dig another trench and back fill the second trench, loosen the bottom of the third trench, and continue this process until you reach the end of the bed. Fill the last trench with the soil excavated from the first.   Note: As you go remember to work in any and all Organic Material that you are going to use, this will work it deep into the soil.
          Tip: If its an existing bed or the middle of the growing season, you can use a garden fork to loosen the soil. Just push it in the ground as fare as you can, work it back and forth, pull the fork out, move the fork a few inches and repeat the first step. After you get done with the fork, spread lots of compost or smaller organic matter and it will works its way down into the fork holes.
              *  For larger fields like hay fields or lawns, uses a Lawn Aerator, Spiker, Plugger, Core Aerator, or Aerifier in place of a garden fork and spread lots of compost or smaller organic matter and it will works its way down into the fork holes. Most of the time with a hayfield it get's to acidic because of all the animal urine. So it will probably need more lime than anything to correct the problem.

#3 Back To Eden? There is another wonderful way to get larger and even smaller areas back to a most perfect way to grow and its rather simple! HURRY TELL ME! I knew you would ask, lol! Check out this video called "Back to Eden", its amazing how he prepared his site to garden. It is a 2 hour video but what else do you have to do on a cold winters evening! On-line video

#4 If you don't want to go through all that work, do like I do and build "Raised Beds" and garden in those. That way you can control the type of soil and its drainage.


  Here were just a few more tips for your soil. Remember more time spent here will be worth it in the long run. Playin in the dirt is a lot of fun, so dig in there! Next week we should finish our talk on soil.


"Grace is God giving us what we do not deserve and mercy is God not giving us what we do deserve."

 Linked With:
Harvest Mondays, Back Yard Farming Connection Hop, The Country Garden Showcase, Teach Me Tuesday,  Wildcrafting Wednesday,  Down Home Blog Hop,  Country Homemaker Hop, The HomeAcre Hop,  Thursdays Favorite Things, Fridays Fertilizer Flaunts, Fantabulus Fridays, Weekend Whatever, Farm Girl Friday, Farm Girl Blog Fest, Clever Chicks Blog Hop, On it, In it and Around it, A Pinteresting Party, Sweet Saturday 

Saturday, January 12, 2013

"Great Soil is a Gardens Foundation", Part 1

   Good soil in the garden is like building your house on a Solid foundation or feeding your children a well balanced diet! Over the next few posts I will give tips and suggestions on how to get your garden soil to the best it can be. I have covered some of these things before and will link back to them as we go. I remember my dad and Grammie spending more time preparing the "dirt" in the garden more then anything. Not only would they spend time on the soil for the garden but they would test all the hay fields on the farms, so it must have been important! Plus that's where all those good vitamins and minerals come from that you want to put into your body!  So how to get it to it's best?
   #1 You want to do is test the pH of your soil, it doesn't matter if it is in the garden, lawn, hayfield or even your potted houseplants. Yes, I said potted houseplants, even the pH in them will change overtime. The ph (acidity level) of your soil has a large part to do with how well your plants grow, ph is tested on a scale of 0 to14, with 0 being very acidic and 14 being very alkaline. Most plants grow best in soil with a fairly neutral ph, between 6 and 7. When the ph level is lower than 5 or higher than 8, plants just won’t grow as well as they should, unless that is the area that they grow best in. Every Home and Garden store sells these kits or you can send your samples of to your local agriculture dept. to have professionally tested.
   Note: My new friend at "Let This Be in You" blog, has a wonderful in depth post on "Soil Testing", so please click the link to go read more about this!
  #2 You want to do a composition test or "the squeeze test" as Grammie called it. Soils are classified as clay soils, sandy soils, or loamy soils. Clay is nutrient rich, but slow draining. Sand is quick draining, but has trouble retaining nutrients and moisture. Loam is generally considered to be ideal soil because it retains moisture and nutrients but doesn’t stay soggy.
   To figure out your soil type, take a handful of moist (but not wet) soil from your garden, and give it a firm squeeze. Then, open your hand. One of three things will happen: 1) It will hold its shape, and when you give it a light poke, it crumbles. Lucky you—this means you have luxurious loam! 2) It will hold its shape, and, when poked, sits stubbornly in your hand. This means you have clay soil. 3) It will fall apart as soon as you open your hand. This means you have sandy soil.
   Now you can work on improving it, unless you are one of the Blessed ones with Loamy soil and you can just keep adding good Ol "Black Gold" Compost or you may have to work to improve it and we will talk about that a little later!
  #3 Next you can do the "Percolation Test", this determines the drainage of your soil. This is good to know because some plants grow much better in a well drained soil and some obviously do not! To test your soil’s drainage: 1) Dig a hole about six inches wide and one foot deep (Dad used a post hole digger, if you have one). 2) Fill the hole with water and let it drain completely. 3) Fill it with water again. 4) Keep track of how long it takes for the water to drain.
   If the water takes more than four hours to drain, you have poor drainage (Clay Soil) and if it drains right out within minutes that can be a problem as well (sandy soil)!
  #4 Finally, you want to do the "Garden Champion" test. You know check for your hardest workers, Worms, lol! Worms are great indicators of the overall health of your soil, especially in terms of biological activity. If you have earthworms, chances are that you also have all of the beneficial microbes and bacteria that make for healthy soil and strong plants.
   How to do the worm test? 1) Be sure the soil has warmed to at least 55 degrees, and that it is at least somewhat moist, but not soaking wet. 2) Dig a hole one foot across and one foot deep. Place the soil on a tarp or piece of cardboard. 3) Sift through the soil with your hands as you place it back into the hole, counting the earthworms as you go.
   If you find at least ten worms, your soil is in pretty good shape. Less than that indicates that there may not be enough organic matter in your soil to support a healthy worm population, or that your soil is too acidic or alkaline.Then you need to check the pH again!
    Tip: If you are lacking worms, you can either buy some to add or when you add fresh compost or maybe a friend has some good rich horse manure you can add. Any of these ways will bring a good host of them back to you garden! 
  This will get you started, now onto some other important soil tips in the next part!

For more reading:
 "Great Soil is a Gardens Foundation", Part 2
"Great Soil is a Gardens Foundation", Part 3


Matthew 13:3  "Then He spoke many things to them in parables, saying: “Behold, a sower went out to sow.....8 But others fell on good ground and yielded a crop: some a hundredfold, some sixty, some thirty. 9 He who has ears to hear, let him hear!”


 Linked With:
Harvest Mondays,  Bloom Day,  The Country Homemaker, TALU Tuesday, Teach Me Tuesday, Frugal Tuesdays, Frugal Days Sustainable Way,  Wildcrafty Wednesdays, Wednesday Link Party, The Home Acre Hop, Country Garden Showcase, Farm Girl Blogfest,  Fridays Fertilizer Flaunts, Fantabulus Fridays,  Farm Girl Friday, Clever Chicks Blog Hop,, Simply Natural Saturday, 
Sunny Simple Sunday Link

Tuesday, July 17, 2012

Update:"HUGELKULTUR", Raised Bed Experiment Part2

  Well here is an update on my Hugelkultur Bed that I started this spring. I planted three things in the bed to see what it would do (zucchini, Yellow Squash and Cinderella pumpkins). All three are doing remarkable, even through this very hot and dry weather we have had this summer. I have hardly watered it at all, just to see if it does what they say! So far, so good! As you can see by the pumpkin vines, they are doing the best. I have just swirled (yes "swirled" is a Jethro Bodine word) the vines around the Raised Beds in the walk area, Remember in a Urban Garden you try to use all the space you can.
  I am so impressed with this experiment that I plan to do a few more beds just like this one! It has really cut down on my watering in this bed and that was a blessing because where it has been so dry, my Rain Barrels went totally dry, but finally this past week we have had enough rain to fill them back up. Well, I will just leave with a few pictures of what it looks like!
Hulgelkultur Bed


John 15:1-3 “I am the true vine, and My Father is the vinedresser. Every branch in Me that does not bear fruit He takes away; and every branch that bears fruit He prunes, that it may bear more fruit. 


Linked With:
Home and Garden Thursday 
Frugal Days 
The Country Homemaker 

Monday, April 30, 2012

"Compost Tea Anyone?"

    I have had a few emailed questions about, "What is compost tea?" and "How do you make it"? We all know that compost is a wonderful addition to soil and helps our gardens grow better. Your garden can benefit even more by using compost tea. Compost tea is easily made by soaking or steeping compost in water. I take a piece of cheese cloth, scoop a handful of compost into it, tie it up with a piece of twine and toss it the watering container just like you would a tea bag!
    By using compost tea to replace chemical-based fertilizers, pesticides, and fungicides, you can garden safer and be more protective of the environment. Compost tea also, Increases plant growth, Provides nutrients to plants and soil, Provides beneficial organisms, Helps to suppress diseases, Replaces toxic garden chemicals. So there are many benefits’ from using it!
    Also you can make tea out of other organic things as well such as: Crushed egg shells (for calcium), Grass clippings (for nitrogen), by placing Banana peels in a food processor (for potassium). I have even seen people take all different sorts of vegetable waste from the kitchen and process it that way, dig a hole in the garden and pour it straight in! 
    Funny story! I grossed my daughter and one of her friends out with it a few weeks back. They came carrying the water can to me and said, "There is something wrong with the water in your can"'. I stuck my hand in the water and pulled out the ball of cheese cloth with the compost/horse manure. They asked what it was, so I told them what it was. I just so happened to have a cup of fresh brewed ice tea sitting there with me. So I took a drink and said, "It taste pretty good, want some"? LOL! That really grossed them out! Yes, I did tell them a little later it was for the plants!

Here is a cheap way to make a compost bin, "Dirt Cheap"

Let me know what and how you make your garden tea!

Palms 126:2 "Then was our mouth filled with laughter, and our tongue with singing: then said they among the heathen, The LORD hath done great things for them."

Linked up:
Home and Garden Thursday
 Rural Thursday
Deep Roots at Home
Frugal Days Sustainable Ways
Homestead Helps Wednesday
Teach me Tuesday
Tuesday Garden Party
Your cozy Home Party
Barn Hop 60
Tuesday Blog Hop 

Tuesday, April 10, 2012

Using Ammonia in the Garden!

  As you can tell I like to share things that are not commonly shared or have been forgotten about. Sharing things from gardening to Jesus! To me it all enter twines together, He created us and the garden and we try to create as well!
  I bet you are thinking "ammonia?", he is crazier than I thought but really it has a readily available source of "Nitrogen". Nitrogen is needed to encourage leafy plants like lettuces, kale, etc. You could also use it on others such as tomatoes and peppers, for example, in the early stage of growth but stop early so you don't get a good harvest of leaves, lol! What you buy in the store is diluted but you will still need to dilute it more, (1/2 to 1 cup to 20 gallons of water), I usually pore 2 cups in my rain barrels in the early spring and go from there. Another way to dilute is to put 1 cup in a 20 gallon hose end sprayer and spray away! Ammonia is an alkaline cleaning solution. It's made from chemical compounds, which are handy in the garden and helpful with several outdoor chores. Keep some household ammonia in the garden shed and garage. Here's a few ways to put ammonia to work for you in the garden. The smell can also deter larger animals from your garden, trash cans or other areas. I read where you can use it to kill slugs but I have not personally used it for that, YET! You can stop the itch of a mosquito bite. Put a single drop of ammonia directly on the bite to ease the itch immediately. There are granular types of ammonia fertilizers, if you would rather use those. I guess you could clean stuff too, lol! Here is a link to what "Readers Digest" suggests, Click here for other uses!
    Safety first, always wear gloves when using it, it can burn you. Also never combined vinegar or bleach with ammonia or anything containing bleach with ammonia (it releases toxic fumes when you do). Here is all the scientific stuff about ammonia, Click Here!
    There is probably more uses, so please post and let us know. I learn so much more after these post, its amazing! May God Bless each one of your gardens!


"[Jesus] saves His people from their sins. This is His special office. He saves them from the guilt of sin, by washing them in His own atoning blood. He saves them from the dominion of sin, by putting in their hearts the sanctifying Spirit. He saves them from the presence of sin, when He takes them out of this world to rest with Him. He will save them from all the consequences of sin, when He shall give them a glorious body at the last day. Blessed and holy are Christ's people! From sorrow, cross, and conflict they are not saved. But they are saved from sin for evermore."  J.C. Ryle
 
Linked with:
Garden Life 1-2-3
Homestead Helps Wednesday
Tuesday Garden Party
Teach Me Tuesday
Sustainable Ways #22
Simple Living Wednesday
My Pick Of The Week

Tuesday, March 27, 2012

Ramps, Good Eatin?

Picture from www.bloggingwv.com
  Here in West Virginia it is coming the time of the year were people will grab up their hand shovels and head into the woods to dig up some wonderful tasting "Ramps"! You might be wondering at this point, what in the heck are ramps? Ramps are in the same family as onions, garlic and leeks. The leaves look a lot like that of the Lily of the Valley. They start growing right about now and don't have a very long growing season, so you have to get them quick before they go away! Here is a more in depth research  from "NCSU on "Ramps". Can you grow ramps at home in your garden? You sure can but I would do lots of research on them before you do (good article coming up). They have to have a specific soil type and shaded area before they will grow well! Can you eat them? I love them, they are great to eat with almost anything. I will tell you though don't expect to get to many hugs or kisses from your spouse or anyone else for that matter if you eat them for at least a couple of days, they really stick with you!  In old times ramps were thought to have a medicinal uses for many different thing "A Modern Herbal". Here is another great article on everything that we have talked bout so far "Wild Leeks of Appalachia", especially growing them yourself. We also have a "Ramp Festival" you can go to if you are in the Richmond area, "Ramp Festival"!
  I have to tell you a funny story about the first time my wife was introduced to ramps, by me. We hadn't been married that long and we both had had to work that day. Well, I was gonna be home before her, so I called her and asked what was for dinner. She told me and as we were talking I drove by a guy who was selling ramps beside the road. I told her I was gonna stop and buy some to have with dinner. I could hear a pause in her voice, she either new what they were and didn't tell me or was trying to figure out what they were. Long story short, while I was cleaning the little guys, I opened up all the windows in the house, then started cooking them. Oh, they smelled so good to me (I thought anyway), I couldn't wait! I heard my wife pull into the driveway, the car turn off and the door shut! A looong silent pause, looong! Then I heard from my beautiful new bride, "What in the $%#@ is that smell"? This was while she was out side. When she came in the door, I heard, "Clint what is that smell"? I was a little afraid to say by this point. So I graciously said, "maybe I should finish cooking these on the grill!" She kindly agreed and in 17 years I have never cooked them in the house again. Most of the time I just go to a local Ramp Dinner, it saves time and weeks of airing the house out. But they are very good eatin I tell you, if you have never tried one try it, you might be surprised! 

Monday, March 19, 2012

"HUGELKULTUR", Raised Bed Experiment

  A month back I was searching around on the internet reading about different gardening techniques and I ran across two forms that I had little knowledge on. The first I wrote about a while back called "Back to Eden, Gardening Gods Way" and the other was called "Hugelkultur". I was very interested in both, and both in their own rights are kind of the same concept, but also very different. So what is the method called Heugelkulur?
  Hugelkultur is an ancient form of sheet composting developed in Eastern Europe. The German word - hügelkultur translates as "hill culture". It uses woody wastes such as fallen logs, pruned branches, ect in order to build soil fertility and improve drainage and moisture retention. If you walk through a natural woodland, you will see many fallen logs and branches on the ground. The older these logs are, the more life they sustain. A log that has rested on the forest floor for five or ten years will be covered in moss, mushrooms, wildflowers and even young trees. Poke at it a little and you will notice that the decaying wood is damp in all but the most vicious of droughts. Hugelkultur is designed to take advantage of the natural fertility and moisture-conserving qualities of rotting wood, while speeding the process of decomposition up. The heat produced by decomposition also helps protect cold-sensitive plants.
Before Starting!
  Well I thought this was pretty neat! I am going to experiment with this in one of my "Raised Beds". It would achieve a few thing: get rid of old limbs and brush that I needed to do something with and it would save time, compost and money to fill up the new raised bed that I had built.
  I gathered woody waste materials such as dead logs, extra firewood, pruned and clipped branches, and more. The wood can be either rotting or fresh, although already rotting wood decomposes fastest, so mix it up on new and old!
  In the bottom of the bed, I did lay down a news paper and some compost (about 2 inches). Then I just started layering in all of the above, many different sizes until I reached about 6 inches from the top. You need at least 6 inches of dirt on the top to plant in.
Image 2
Finished Project


Different Stages
  In Image 2 I put the news paper and horse manure in the bottom, to encourage the worms! You can't tell because (silly me got ahead of himself and didn't that a picture between image 2 and the finished project) but i packed the wood of all sizes in as tight and full as I could possibly get them. I keep getting on top and crushing them down with my body weight. Then I covered the wood with other compost materials such as autumn leaves, grass clippings, garden wastes, and manure. (This stage is optional if you aren't planning to plant the bed immediately.) I covered the wood with a few inches of composted horse manure. Then before I plant I will finish it of with regular compost.
  I am gonna plant immediately or you can let the bed sit for awhile to rot. Among the plants known to do well in HugelKultur beds are shade plants, squash, melons, lettuce and a number of different species of berries. Other gardeners plant the bed with cover crops for the first year to improve the fertility even more before adding vegetables or other plants.
 Other ways that can give you similar results, though much more slowly, by simply burying logs and other wood waste in trenches around your yard in areas where you want to improve fertility and moisture control.
In swampy areas, buried logs will suck up significant quantities of water quickly and release them slowly, reducing the chance of standing water or flooding. I actually have an area right along the railroad track that gets standing water in that I will probably try this in. In drier areas, the logs will act in the same way, releasing stored water slowly into the surrounding soil and reducing the need to water. So before you burn, bury!
2 Different styles of Beds

Saturday, March 3, 2012

Coming along!

Total cost of compost bins $2.00!
  I was just wanting to show some of the progress that I have made since I posted about "Dirt Cheap Compost Bins". 
  As you can tell I have added another bin, both were free, other then 2 of the decking boards which were only .51 cents each off the culled lumber rack. And as you can see under the blue tarp, I have loaded up on horse manure. It was free as well! I have a friend that has a horse/goat farm, she says "anytime come get what you need". I also have one of the best neighbors around, he has a trailer and we hauled the manure home and he even helped unload it, great guy. In trade he uses what he needs for his garden. 
  I also took a couple pieces of pipe and drove in the ground beside the bins to store the wood for our fire pit, just to try to keep it up and out of the way. 

4 beds, total $45.00!
  I have added 2 more raised beds (both 32"x17"x6') since my article on "Pros and Cons of raised Beds" and "Urban Garden in a Little space for less then $100.00".  If you remember the others are 4'x4'x17" and 4'x8'x17', so a lot of garden space, for know! I did total up the beds, without the weed barrier, and it came to a grand total of $45.00. Compared to a kit I found on line. (4'x8'x17" kit $375.00 plus shipping) Click here for kit price, a pretty great savings, I think anyway!
  This was part of my intent when starting this blog was to try to show people how cheaply you can do these thing, if not do them for free. For example, my neighbor down the tracks has been doing some projects on his house because they are selling. He has been piling scrap pieces of lumber up behind his building. So I asked him what he was gonna do with it and he said you can have it. You never know unless you ask!
  Well there's an update, I hope you are enjoying watching this little Urban are grow (and keep growing). It is fun to do and keep track of. It is amazing what I have learned as well, just getting back to what I grew up doing! God Bless you all and happy gardening!


"1 Corinthians 4: 1Let a man so consider us, as servants of Christ and stewards of the mysteries of God. 2 Moreover it is required in stewards that one be found faithful."

Saturday, February 25, 2012

"Worms, The Champion Composter"

  I had been wanting to investigate more on "worm composting". So as I was looking around one of the blogs I follow posted about a project they did! A Flock in the City has a great post on creating a worm compost bin. But what is "Worm composting"? Worm composting is using worms to recycle food scraps and other organic material into a valuable soil amendment called vermicompost, or worm compost. Worms eat food scraps, which become compost as they pass through the worm's body. Compost exits the worm through its' tail end. This compost can then be used to grow plants. To understand why vermicompost is good for plants, remember that the worms are eating nutrient-rich fruit and vegetable scraps, and turning them into nutrient-rich compost. So I'm thinking its worm poop, right? lol
  To get started you need worms, a container and "bedding." I have learned something interesting about worms. Growing up on the farm I always thought, "A worm is a worm is a worm" boy was I wrong, all worms aren't created equal. Don't try using your garden-variety night crawlers. They need to worm their way through dirt to eat and survive and they don't dine on organic waste. So what kind of warms do you need, for this you need red worms -- Eisenia foetida (also known as red wigglers) or Lumbricus rubellus (manure worm). I hope I spelled those right, lol!
   How many red worms does a person needs when starting? Some experts recommend a one-to-one ratio -- one pound of worms for one pound of garbage. But others recommended two pounds per pound of garbage, so I guess somewhere in between will do. The other thing you have to keep in mind is that worms multiply like rabbits, so they say! (Or maybe it's more like rabbits multiply like worms!) Anyway, if you give them adequate food and a good home they can double their populations every 90 days. So, you may want to start out slow and with fewer worms than you think you'll need and the resulting worm population explosion will take care of the rest. I found that to be really interesting!
   I guess the only real important thing left is, what about the environment? Ideally your worm compost bin should be in an environment where the temperature ranges between 40 to 80 degrees Fahrenheit and red worms generally prefer temperatures in the 55 to 77 degree range. (Unlike backyard composting with bacteria who like it hotter than heck, worms are more like us.) Many people use a corner of their kitchen, or, if they have a worm bin outside and live in a place where it does get chilly in the winter, they move it inside for the cold months. So after you build your bin CLICK HERE! or buy a kit, you should be able to start pouring scraps in and before you know it have great "worm compost for you garden or house plants.
  Here are some good sites I found that you may want to look at as well. Most of this information came off them but they do have more for you!


"I do think we have a responsibility to care for the environment – we ought to care for every resource God has provided for us."  John MacArthur

I am linked to"

http://homesteadrevival.blogspot.com/
http://whitewolfsummitfarmgirl.blogspot.com/

Saturday, February 18, 2012

"Dirt Cheap Compost Bin's"

Junk taking up space!
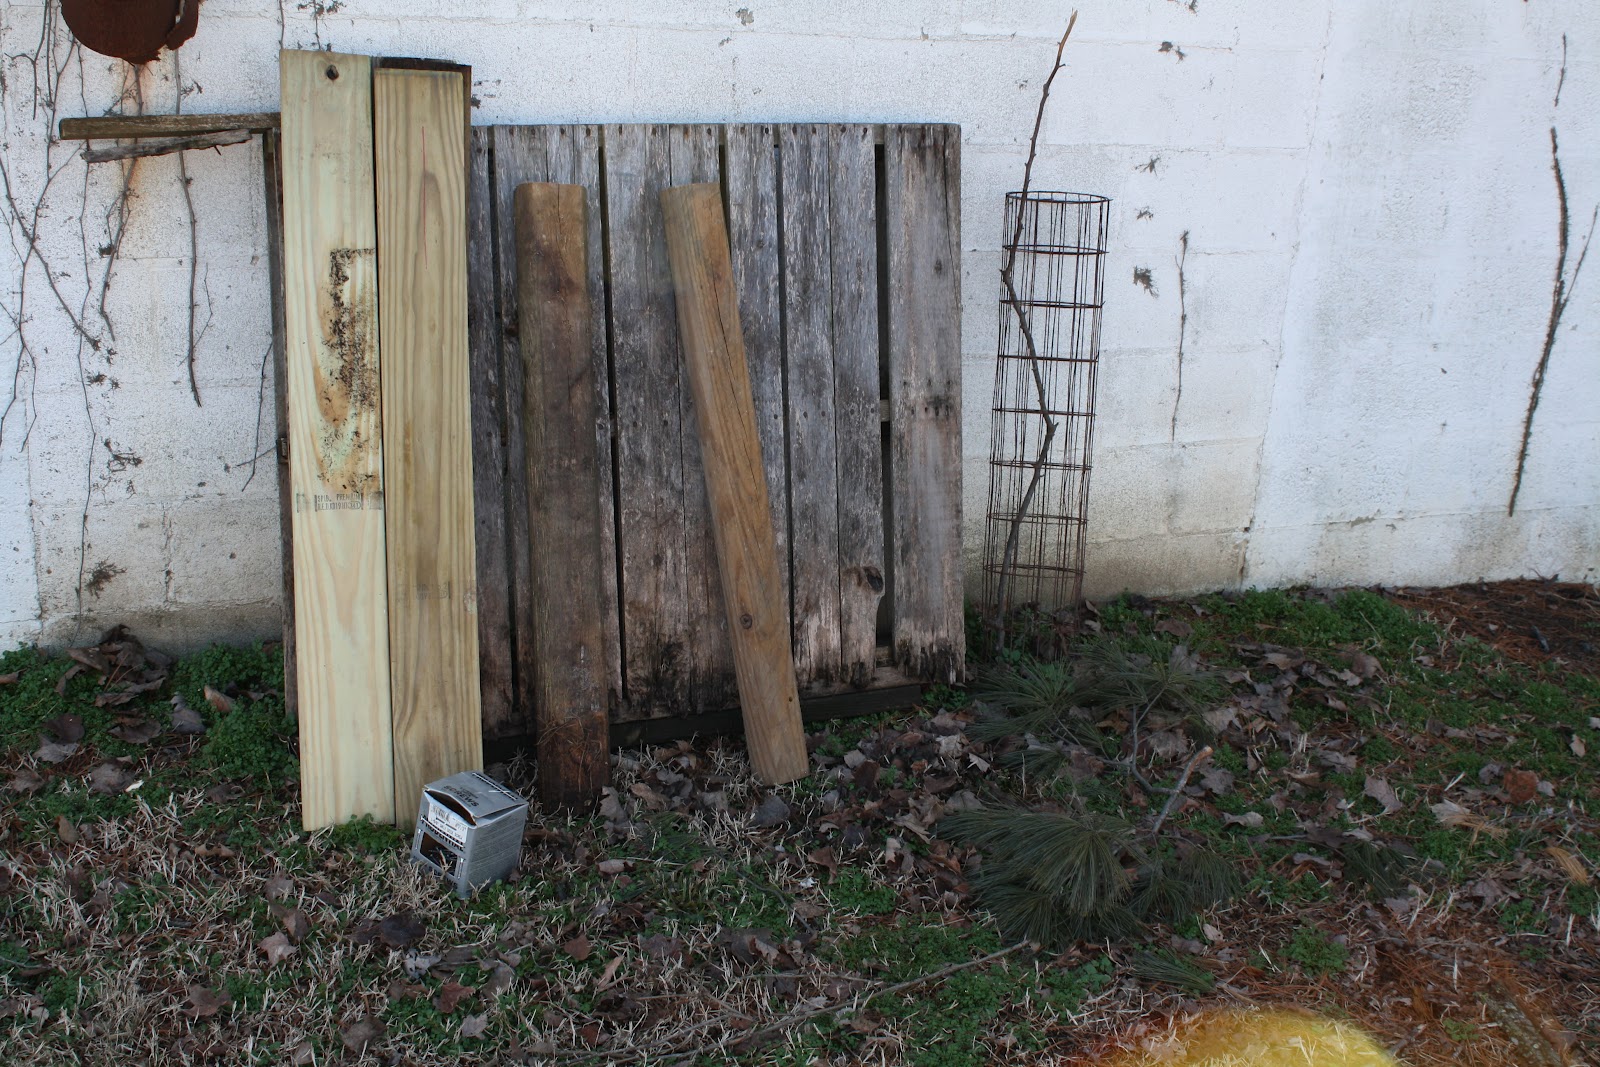
   Well last season was the end of my two compost bins that I had had for 4 years. They had rotted beyond repair. So we had to have a wienie roast with them! lol! After a while the yellow pine that I had made them out of started to rot away. So because I am trying to re-purpose and do things as cost effective as I can.  I took this pile of scraps and a pallet and made a compost bin. It's amazing what you can find just laying around from older projects to do the job that you need.
  What is a compost bin, you might ask? A compost bin is usually a bin or barrel that holds plant matter (grass, leaves,etc.) or very specific type of animal product like egg shells,manure or kitchen scraps. You put green plant matter, brown plant matter, and an activator in this container, mix it well and let the microorganisms do the rest. I love collecting the little worms as I garden and toss them in the bin or in my raised beds. Microorganisms begin to feed off this matter and produce more of themselves. This heats up the pile, sometimes up to 140 degrees, and disinfects the pile through that prolonged heat. After the process is over (2 weeks to 2 years, depending on how active you are with it) you are left with a dark soil that can be used for various things like a soil amendment, ground cover, etc. But I will do another post and give more information. Just build on it's free, rich soil for your gardens! How did it turn out? Read on:

Saturday, February 11, 2012

"Back To Eden" Gardening God's Way!

    This is the whole reason I garden! I challenge you to take the time to watch this video. I guarantee you will learn A LOT about gardening for the Master! "Back to Eden" is a very eye opening video in many areas. I could sit here and try to tell you everything that you can learn but I would not do Paul justice! I had a fellow blogger send me this link and inform to me of this video ( Online Video to Back to Eden.)
  If you are trying to be a sustainable person and trying to get away from all the craziness of life, watch and learn. I had to watch it twice already! You will learn so much! You can even use it in raised beds. I just need to stop and you need to watch, don't I? Wait until you have a little over a hour and a half, make a cup of coffee and learn! Please let me know your thoughts when you finish watching the video.

After years of back-breaking toil in ground ravaged by the effects of man-made growing systems, Paul Gautschi has discovered a taste of what God intended for mankind in the garden of Eden. Some of the vital issues facing agriculture today include soil preparation, fertilization, irrigation, weed control, pest control, crop rotation, and PH issues. None of these issues exist in the unaltered state of nature or in Paul’s gardens and orchards.
“Back to Eden” invites you to take a walk with Paul as he teaches you sustainable organic growing methods that are capable of being implemented in diverse climates around the world.
  BACK TO EDEN shares the story of one man’s lifelong journey, walking with God and learning how to get back to the simple, productive methods of sustainable provision that were given to man in the garden of Eden. The organic growing system that has resulted from Paul Gautschi’s incredible experiences has garnered the interest of visitors from around the world. However, never until now have Paul’s methods been documented and shared like this!
As a part of our mission to freely give and freely receive, the makers of BACK TO EDEN have agreed to stream the full feature film online for free. For viewers who support this film and who want to help other people see it, please share www.backtoedenfilm.com, buy copies of the full feature film to give to others or host a screening in your community.


Tuesday, February 7, 2012

Why grow your own Veggies?

  People ask, why do you take time to grow a garden? Well there are many reason's why. Each vegetable you grow in your little garden on average has 3 times the vitamins and minerals that a store bought veggie has. The taste is so much richer and fresher, you won't believe the difference in the two. Mainly because must supermarket veggies have been grow in hot house (hydroponics), so you don't get all the good stuff from the soil. That's why it is so important to have good soil! When the distance from the garden to the table is just a few feet away, you will enjoy just harvested, nutrient packed produce that is superior to any store bought counter part because it is so fresh. Your garden doesn't have to be huge, as a matter of fact you can grow the a great selection of veggies on a sunny deck or patio.
  Another reason and one of my main reason's is because you can grow them organically. Most commercial growers use chemical pesticides and fertilizers that can harm you and your family when ingested all the time. A chemical fertilizer is defined as any inorganic material of wholly or partially synthetic origin that is added to the soil to sustain plant growth. Many artificial fertilizers contain acids, such as sulfuric acid and hydrochloric acid, which tend to increase the acidity of the soil, reduce the soil's beneficial organism population and interfere with plant growth. Generally, healthy soil contains enough nitrogen-fixing bacteria to fix sufficient atmospheric nitrogen to supply the needs of growing plants. However, continued use of chemical fertilizer may destroy these nitrogen-fixing bacteria. Furthermore, chemical fertilizers may effect plant health. For example, citrus trees tend to yield fruits that are lower in vitamin C when treated with high nitrogen fertilizer. Fungus and bacterial disease resulting from the lack of trace elements in soil regularly dosed with chemical fertilizers is not uncommon. This lack of vital micronutrients can generally be attributed to the use of chemical fertilizers. On the other hand organic fertilizer such as manure treated with CBPA adds nutrients to soil, increases soil organic matter, improves soil structure and tilth, improves water holding capacity, reduces soil crusting problems, reduces erosion from wind and water, improves water holding capacity and improves buffering capacity against fluctuations in pH levels.

Saturday, February 4, 2012

"Pro's and Con's of Raised Bed Gardeing"

   By this point I am sure that you have planned your garden layout and picked the plants you want to grow and even ordered the seeds. The sit you have picked should have at least 6 hours of daylight and you should pick a place close to a water supply. So have you figured out if you want a conventional or a raised bed garden! Here are the differences between them both.
  A conventional garden is one in which a large area is planted in rows at the ground level. It's probably the type of garden you are used to because that is mostly what we grew up with.Though these gardens have been the norm in our region for years past, many home gardeners are switching to raised bed gardening which is much easier, less expensive, and less time consuming. Conventional gardening takes more time out of busy lives. Conventional gardening requires more fertilization, compost, weed and insect control, as well as back breaking tilling of soil and picking of vegetables. I won't spend much time  getting into the pros and cons of conventional gardens as there are so many benefits to gardening in raised beds.
  Well what is a raised bed garden and what are the pros and cons. A Raised bed is just what the name suggests it is, it's a garden raised up off of ground level. It can be as high as you want it, they can be created from anything that will hold dirt and as small or large as you like. I will go over some of the pros and cons but if you would like to see how to build one cheap, go to my post "Urban Garden in a little space for less than $100.00". 
   Here are some of the pros and cons of raised beds:

Sunday, January 29, 2012

Urban Garden in a little space for less then $100.00!

My little Farm
  As you know from other posts I grew up on a farm in Ritchie County, West Virginia. But now I live on a small lot in the city of Nitro, West Virginia. I have always wanted a small farm but I know that at this point in my life I can not afford one. I miss farming but I got to thinking why can't use the little bit of space that God had given me? Right outside my backyard fence, beside the railroad tracks is a 30'x65' space that isn't being used. I have to keep the grass cut back there but we don't use it for much else. That's almost 2000 sq. ft. of unused space, much more garden then I have on the inside of the fence. If I used this space it would do a few things, I would help clean up our little town, make my garden space much larger, keep my garden out of the way of flying volleyballs and my garden digging Spaniel would not be tempted. I also would be able to be able to fulfill the desire to have a little farm.    
Assembling
  First thing I did was clean everything up, there were some trees and brush that had to come down. Some of the trees were old and half dead anyway. Must of the wood was given to a neighbor to burn in his fireplace. It was amazing of the neighbors curiosity of what I was doing. I can't take all the credit though, my friend and neighbor J (which I will call him to protect his privacy) was starting to do the same thing in his smaller backyard and we both were sharing ideas with each other. J is a very good guy, he is a walking encyclopedia when it come to  just about anything out there. We have shared many different Ideas over the years.
After 2 were assembled
   Just 4 doors down from my house is our local greenhouse (I know awesome, right), the owner and I have become very good friends over the past 16 years. So after I got things cleaned up on my new 2000 sq. ft. farm I asked him if I could buy some of the commercial black weed barrier that he puts down all around his outside areas of the greenhouse to put down in my new garden are. I didn't need a whole roll of that stuff and it is very expensive for a whole roll, he sold it to me by the foot and the staples to hole it down. Total cost for what I needed was approx. $60.00! I have just started with a 36'x10'.
   Now to start adding my Raised beds! Went you pick what you are gonna build your raised beds out of, keep in mind the taller they are, the less bending, if they are too wide you will have to step into the bed and you don't want to do that. Also what materials are going to build the out of?  You can build them out of just about anything that will hold dirt but I went to the local Bid Box lumber store and went to what is called there culled lumber area. I bought enough 2x8's and 10's to build a 4'x4' bed and a 4'x8' bed for $16.00. A good rule of thumb for the size of garden you need is 160 square feet per person. You can go larger if you want to share and persevere for the winter months.  I use treated, some say you shouldn't but I used to work in a lumbar yard and I know they don't treat your lumber with the harsh chemicals that they used to, it's mostly done now days with a a salt type formula. But if you are concerned you can paint the inside of the boxes to seal them. Keep in mind, you only want to build these once and untreated will rot in know time. Note: I have seen people use railroad ties, something that I have an ample supply of ever few years when the railroad changes theirs out, but the have worse chemicals in them then the old treated lumber.
   Any way after I built my first 2 beds, I threw all kinds of fillers in the bottom of them to take up some of the space. Everything I threw in though is biodegradable. Anything from scrap pieces of wood to old news papers and even old bills that you never what to through out in the trash but within a few weeks the worms will make them so you won't recognize them. Note: Do Not use anything with colored ink unless it is bio friendly! Then I topped it all off with half of what was in my compost bins and the rest a mixture top soil and manure.
   Well now I am off to get more lumber I have at least 4 more raised beds to build and a fence to put up around it to keep animals and people walking up and down the tracks from eating my veggies. So far I only have about $100.00 for these 2 beds, the weed barrier, hardware and even the soil. I will post pictures as I continue this ongoing project.
2 Beds Finish!
Ezekial 17:8 "It was planted in good soil by many waters, To bring forth branches, bear fruit, And become a majestic vine.”’
By:Clint Baker
Jan. 29,2012