Showing posts with label Tomatoes. Show all posts

Sunday, April 14, 2013

"Planting space between tomatoes and Planting tips"

 Its getting time here in West Virginia to plant tomatoes out doors! I usually wait until around "Mothers Day", but this year I may do it a little early and just watch the night time weather for frost and such. What brought this question up, was a friend ask me for some tips on tomatoes and I thought I had this on here but I didn't.

So, how far apart should I space my tomato plants?
  This depends on whether you are staking, caging, or letting them sprawl and on the particular variety’s growth habit of dwarf, determinate, or indeterminate.  
  Staked indeterminates can be grown with spacing of 1 foot between plants, caged indeterminates can be grown with spacing of 2 feet between plants, and for sprawling, you need at least 3 feet between plants.  They will be more productive if more space is given.I have grown indeterminates 3 feet between plants and 4 feet between rows (remember is you are planting in raised beds you can get by with 2 feet but that's as close as I would go)..  This gives them enough room to sprawl out and really produce.  
  Determinates can be planted a bit closer than indeterminates especially if they are let sprawl.  They will produce well with 2 feet between plants and 3 feet between rows.  Again, I have gotten by with a little closer but remember, the more light and air the more productive they will be.
  The dwarf varieties are suitable for pot culture but if grown in soil, they can be planted as close as 1 foot apart.  
  A major contributor to the spacing question is the area of soil the roots expand into.  A large tomato plant may have roots 3 feet or more deep and up to 10 feet long from the plant stem occupying up to 300 cubic feet of soil.  Most people plant tomatoes too close together which reduces overall production.  If given a choice between having more plants with less fruit or less plants with more fruit production, I would never plant indeterminates closer than 3 by 5 feet! But sometimes we don't always have that space.
  The soil should be a good quality loam with loose texture.  Since most of us don't have soil with those characteristics, it is best to work on building up the soil we have.  A soil test will tell the pH level and give recommendations to raise or lower it if needed.  Tomatoes grow best in soil with a pH of 6.0 to 6.5 which is just a bit on the acid side.

Planting Tip:
  Start by getting a vigorous seedling to set out, hopefully that you have started.  Mix topsoil, 5 gallons of high quality compost, 1 cup of 13-13-13 fertilizer, ½ cup of cane sugar, ¼ cup of table salt, Ground tho powder eggshells and 1 level shovelful of hardwood wood ashes in a wheelbarrow.  As you plant Put 3 inches of of mixture in bottom of hole, put an inch or so of plain topsoil on top and set a seedling into the plain soil so that its roots can grow into the amended soil beneath. For the 1st week or so water everyday with a couple cups of warm water to stimulate plant growth, remember tomatoes are warm weather plants.

More Good Reads:
Heirloom vrs. Hybrid Part 1
Heirloom vrs. Hybrid Part 2
Saving Tomato Seeds

Genesis 2:8 The Lord God planted a garden eastward in Eden, and there He put the man whom He had formed.

Linked with:
Weekend Whatever, Simply Natural Saturdays, Party Time, Sunny Simple Sundays, Monday Funday, More The Merrier, Clever Chicks Blog Hop, Natural Living Monday, Harvest Monday, Homestead Barn Hop, Teach Me Tuesday, Backyard Farming Connection,

Sunday, October 21, 2012

Results of Tomato Stake Trials!

Results of Tomato Stake Trials are In!

 I don't like tomato cages so this year I tested four different tomato stakes, from left to right they were: 
   1) Steel T-posts 2)Wooden Stakes 3)Bamboo Stakes 4)Store bought Plastic coated Stakes

 First, was the Steel T-Post. I liked them the most, they were very sturdy and didn't ever bend over, held up to strong winds and the heavy laden fruit on the plants! They do cost a little but the will last for a very long time. I am sure you could use small pipe or re-bar as well.
 Second, the old fashioned wooden stake. They were sturdy but not quit tall enough, not very costly. They only real problem I see is that you may only get 2 or 3 years out of them do to termites and rot.
 Third, was the Bamboo stakes.These were my second favorite! They were free, remember my neighbor/friend Jason? Well, he found a patch of what we call around here "River Cain", AKA "Bamboo". All we had to go do was cut it and haul it. They were tall enough because we cut them 9 to 10 feet tall, so after putting about 2 feet in the ground, they were just right. They held up to the wind and laden fruit and Bamboo doesn't rot so they should be around for awhile!
 Fourth, were the cheep plastic coated stakes. I really thought these were gonna be the best thing since sliced bread until the all powerful "Derecho Storm" hit and bent them right over to the ground and I mean to the ground! The other 3 did just fine in the storm but the plastic stakes that a buddy talked me into trying bent right over. I will just used them to stake my pepper plants next year, never tomatoes again, lol!
  I know there are other ways to stake tomatoes out there that I didn't try this year.. If you have tried something different and have had success or failure please share with us.


“For I know the thoughts that I think toward you, says the LORD, thoughts of peace and not of evil, to give you a future and a hope.” Jeremiah 29:11 


Linked With:
Farm Girl Blog Fest
Farmgirl Friday
Fall Harvest
Rural Thursday 
Country Homemaker Hop
Frugal Days
Frugal Tuesdays
Teach Me Tuesday
The Country Garden Showcase
Barn Hop 86

Saturday, September 15, 2012

Saving Tomato Seeds, for next year?

  Well its that time of the year when we will start canning, cleaning the garden up, planting fall crops and one of my favorite thing to do is, "Seed Saving", something Grammie taught us how to do! One of the plants I want to carry over this year is my San Marzanos Tomatoes! Why you may ask, because you can get that wonderful tomato that really love, year after year and it will start to adapt to your environment (read more in link below on "Heirloom".) So how do we do this task that for generations people have done?
 Well prabaly the most important part is, choosing the right tomatoes for "Seed Saving".
 There are a few things to keep in mind when deciding which tomatoes to use for seed saving:
* They should be from "Heirloom" varieties. "Hybrid" tomatoes won't come true from seed, so if you save seed from a hybrid and plant it, you will get tomato plants, but there's no way of telling whether the tomatoes will be any good or if you will even get the same tomato?
*They should be fully ripe, but not over-ripe.
* They should be the best-looking tomatoes on your plant. When you save seeds, you want to save from those fruits that have the very best quality.
Photo by "The Redeemed Gardener"

Good tomatoes = good seeds = really good tomatoes next year!


So here is a step by step on this  really simple process.
1. Choose a ripe and the most perfect tomato you have on the healthiest plant you had all season.Choose it off the plant that produced the biggest yield and with the least amount of problems.Remember, you will be getting the same plant as the fruit comes from next year.
2. Cut it open, right through the middle!
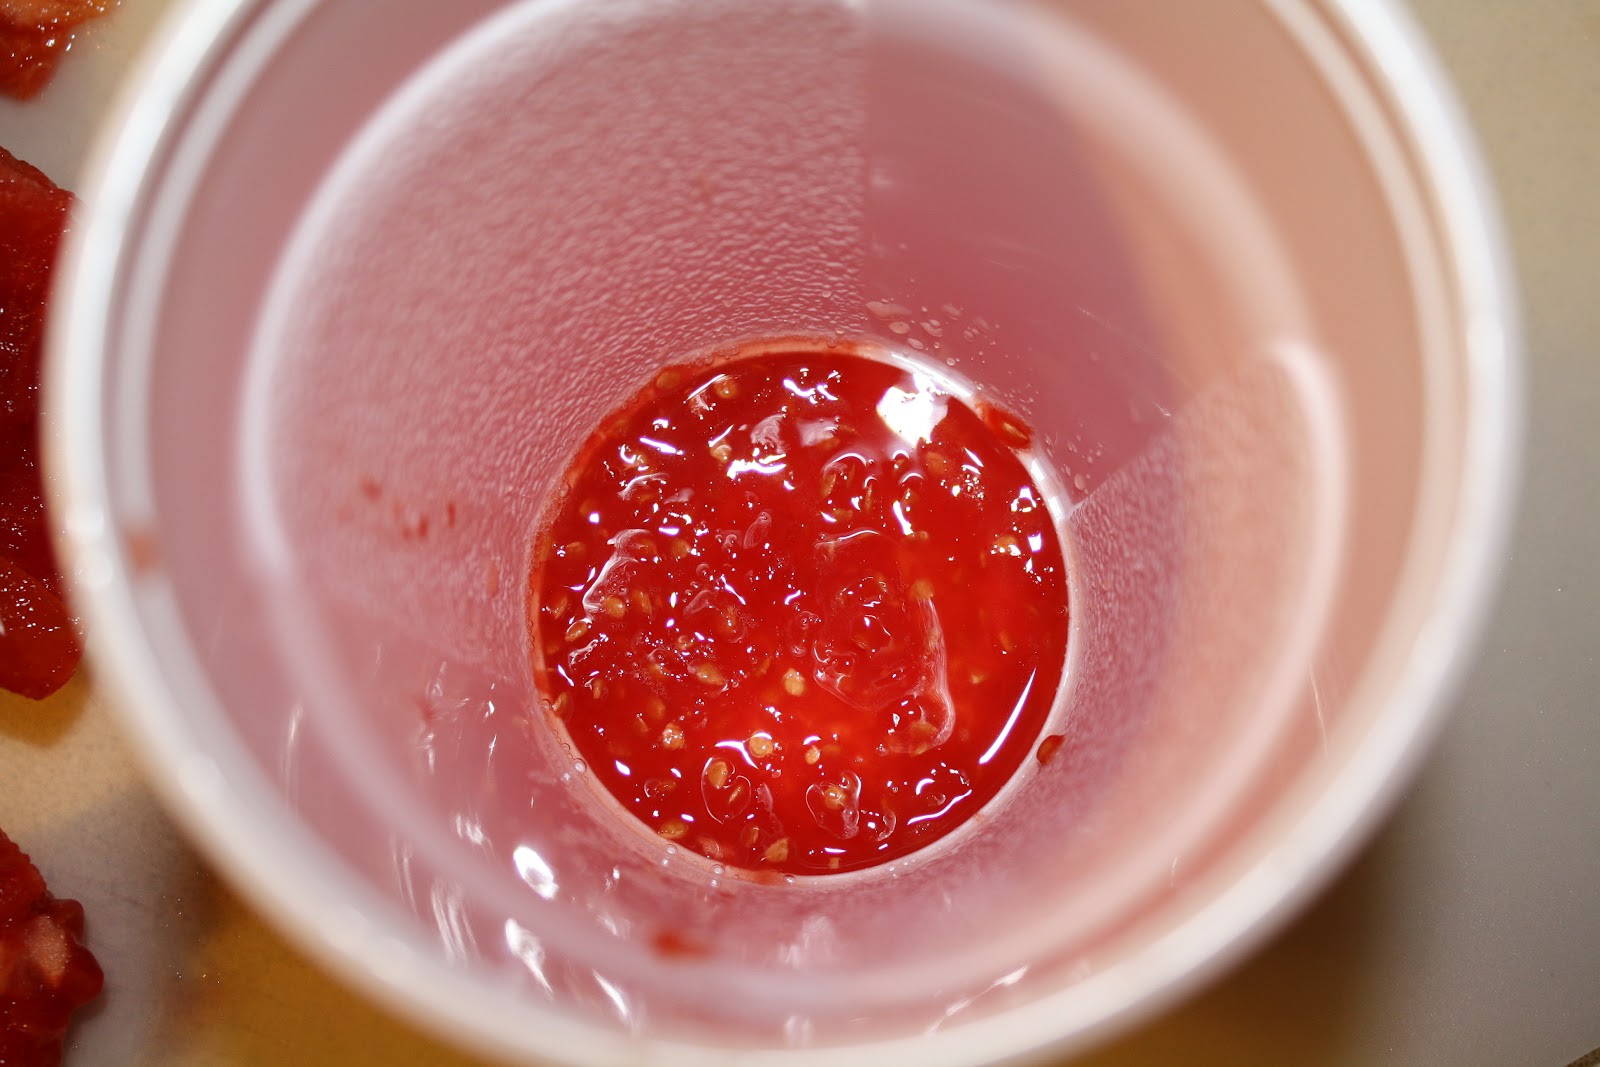
3. Squeeze the seeds, "gunky" stuff, out into a small cup or jar.
4. Cover the seed gunk with two to three inches of water.
5. Label your cup so you know which variety of tomato you saved seeds from.
6. After about three days, white mold will start to form on the surface of the water. This means that the gel or "gunky" stuff, lol, on the seeds has dissolved.
Photo by "The Redeemed Gardener"

7. Once you see the white mold, pour off the mold, the water, and any seeds that are floating (Remember the post "Sink or Swim" floating seeds are bad - they probably won't germinate next year) You want all of those seeds sitting at the bottom of the cup, they will have a better chance to grow strong, healthy plants next year.
8. After you've poured the mold and bad seeds off, drain your seeds in a fine mesh strainer and rinse under running water. It's not a bad idea to stir the seeds around with your fingers to help remove any extra gel that may be clinging to them.
9. Dump your rinsed seeds onto a paper plate that has been labeled with the variety name. The paper plate will wick away the water and help keep seeds from getting moldy, we don't want that!
10. Make sure your seeds are in a single layer on the plate, and set it aside a few days so the seeds can completely dry.
11. Once they're dry, put them in a labeled envelope, baggie, or other container and store in a cool, dry spot.
*A link to help with more in depth question's you may have: Master Gardener's and Organic Gardening (for more related photo's)!


“And we have known and believed the love that God has for us. God is love, and he who abides in love abides in God, and God in him.”  1 John 4:16

Friday, September 7, 2012

"San Marzano's" Grown in West Virginia!

  I tried a new variety of tomato this year. Well, new for me, lol! It is the "San Marzano" tomato from Italy. San Marzano Tomatoes are a plum tomato variety. They are a household name when it comes to making tomato sauce in Italy. They’re also particularly suitable for preparing peeled tomatoes, canned tomatoes, or dried tomatoes. In fact, skin comes off so easily from San Marzanos that they’re sometimes called, “The King of Peeled.”
  They're named for their origin, certified San Marzano tomatoes are grown in Campania, a region of southern Italy just above the toe of the boot, called Sarnese Agro-Nocerino (Valle del Sarno or valley of the Sarno). Those grown and processed in the valley of Sarno in compliance with Italian law are stamped with “D.O.P.” emblem on the can label, which means "Denominazione di Origine Protetta." Don't ask me, thats a little bit more than I really needed to know. I just though maybe some of you smart fellers out there would want to know, lol!  The taste of “genuine” San Marzanos is said to be, because they are grown in volcanic, rich soil and the Mediterranean climate. 
  Mostly here in the U.S. we have grown "Roma's"for the same Reasons and uses. Grammie always had a row or two of Roma's in her garden to can. In looking up some differant facts on "San Marano's". I found a great web site that tells you everything from facts and History to Recipes for your tasting www.sanmarzanotomatoes.org ! And of coarse I recieved my seeds from Botanical Interests
  I personally love them. I am gonna try to hold seeds back and get them used to the good ol' West "By Golly" Virginia soil and environment. While we don't have the volcanic soil and Mediterranean climate, we do have all kinds of coal rich soil and a power plant down the river that could make the water warmer....Okay, I guess I am stretching it a little but maybe after a few years they will adapt better, lol! So if you are looking to try a different heirloom next year try San Marzano's, good luck!


Daniel 4:12 Its leaves were lovely, Its fruit abundant, And in it was food for all.